
Steps to building a house are the ordered phases that take your home from an empty lot to move-in ready: planning, permitting, site prep, foundation, framing, mechanicals, finishes, and closeout. In Galveston, a coastal code path and inspections guide each stage to ensure safety, durability, and timely completion.
By Aftab Ali — Manager, Tip Top Builders
Last updated: 2026-06-29
Quick summary
Homebuilding success comes from a clear 12-step plan, disciplined scheduling, and early selections. Align design with site constraints, book inspections ahead, and plan around coastal weather. In Galveston, elevation, drainage, and wind-rated assemblies are non-negotiable for a durable, code-compliant home.
This complete guide explains the residential build journey from first idea to keys, with Texas-specific tips and field-tested checklists we use on real projects. You’ll see where projects slip, how to keep momentum, and what to document at each milestone.
- 12-step roadmap from goals to handover
- Texas permitting, inspections, and sequencing
- Coastal best practices for wind, drainage, and moisture
- Tools, checklists, and mini case studies from our work
Above-the-fold roadmap: your 12-step house-building plan
A successful home build follows 12 clear steps: goals and program, site selection, design, permitting, site prep, foundation, framing, rough-ins, exterior and insulation, drywall and interior, fixtures and finishes, and final inspections with handover. Early scope lock and sequenced trades minimize rework and keep closing dates predictable.
Here’s the thing—most stress in homebuilding comes from surprises. A clear map beats guesswork. Below is the exact flow we guide homeowners through at Tip Top Builders in Texas. It taps our planning and design team, excavation crew, and construction management approach to keep every phase on schedule.
- 1) Goals & program: size, rooms, must-haves, energy targets.
- 2) Site selection: access, utilities, setback/height rules.
- 3) Design & engineering: plans, structure, MEP, elevations.
- 4) Permits & approvals: zoning, building, environmental.
- 5) Site prep: clearing, grading, erosion control, staking.
- 6) Foundation: forms, rebar/post-tension, pour, cure.
- 7) Framing: floors, walls, trusses, sheathing, roof deck.
- 8) Rough-ins: HVAC, electrical, plumbing, fire blocking.
- 9) Exterior & insulation: windows, doors, WRB, insulation.
- 10) Drywall & interior: hang, tape, texture, trim, cabinets.
- 11) Fixtures & finishes: paint, flooring, lights, plumbing sets.
- 12) Final inspections & handover: punch list, manuals, warranty.
To keep this plan front-and-center, we also recommend a simple table of contents for quick jumping around:
- What are the steps to building a house?
- Why a clear plan matters
- How the process works
- Methods and approaches
- Best practices (coastal Texas)
- Tools and resources
- Mini case studies
- FAQ
- Conclusion & next steps
| Phase | Typical Duration | Inspection Milestones |
|---|---|---|
| Design & Engineering | 4–8 weeks | Structural/energy review |
| Permitting | 2–6+ weeks | Plan approval issued |
| Site Prep | 1–2 weeks | Erosion controls in place |
| Foundation | 1–2 weeks | Pre-pour inspection |
| Framing | 2–4 weeks | Framing/sheathing inspection |
| Rough-ins | 2–3 weeks | MEP rough inspections |
| Insulation & Exterior | 1–2 weeks | Insulation/housewrap |
| Drywall & Interior | 2–3 weeks | Drywall nailing (as required) |
| Finishes | 2–3 weeks | Finals scheduled |
| Finals & Handover | 1 week | CO/occupancy granted |
Scheduling note: Hurricane season in coastal Texas typically spans June 1–November 30. We plan pours and roof dry-ins to dodge the worst weather windows and protect materials on-site with proper staging and cover.
What are the steps to building a house?
The steps to building a house are a standardized sequence: define requirements, select and evaluate the site, complete design and engineering, obtain permits, prepare the site, build the foundation and frame, install mechanical/electrical/plumbing, complete exterior and insulation, finish interiors, and pass final inspections for occupancy.
Think of the process like a relay race—each discipline hands the baton to the next. In our projects, we use construction management practices to reduce handoff friction. For example, we sequence framing deliveries to match wall sections, so crews set 100–150 linear feet per day without idle time.
For coastal Texas, we also coordinate wind-rated assemblies and elevation requirements. Hurricane season runs through late fall, so we plan pours and roof dry-ins to avoid major storms when possible. That simple decision can save weeks of delays across a build while keeping materials dry and protected.
Want a deeper preconstruction path? See our guidance in Planning and Development and our hands-on Planning & Design services to structure decisions before crews mobilize.
Why a clear, 12-step plan matters
A defined 12-step plan reduces rework, speeds approvals, and protects quality. Clear scope limits change orders, inspections are booked earlier, and trades work in sequence. The result is fewer delays, stronger compliance, and a smoother move-in with warranty-ready documentation.
We see three recurring risks when plans are vague: design gaps that trigger revisions, late utility coordination, and unbooked inspections. Any one can stall a week or more. With a locked plan, we pre-book inspections, release long-lead items (like windows), and align excavation with staking in a single three-day window. For scheduling tactics that mirror standard project phases, this overview of project management phases can help frame your thinking; see the five-phase workflow reference for context.
Another advantage is transparency. Homeowners know what’s next, what’s done, and what’s on watch. Our team uses checklists for each step—from silt fence placement to nail pattern verification—so nothing slips. That discipline scales across custom homes, infill lots, and small subdivisions, and aligns with our construction scheduling approach for predictable outcomes.
How the house-building process works (step by step)
From first conversation to keys, the workflow moves from planning to permits, then site prep, structural build, systems, and finishes. Each step has inputs and outputs: decisions, drawings, inspections, and sign-offs that keep work moving and the home safe, efficient, and code-compliant.
1) Goals, budget guardrails, and buildability
- Clarify program: bedrooms, baths, office space, storage, porch depth.
- Set performance targets: insulation R-values, air sealing, window U-factors.
- Confirm buildability: setbacks, allowable height, lot coverage, and floodplain.
Action: We translate wish lists into a one-page program and a site due-diligence memo before design sprints begin. That single page becomes the north star for thousands of micro-decisions that follow.
If you’re early, this primer pairs well with our construction planning guide, which explains how to convert ideas into buildable scope.
2) Site selection and due diligence
- Evaluate access: driveways, turning radii for deliveries, utility tie-ins.
- Run environmental checks: wetlands, protected trees, drainage paths.
- Survey & stake: corners, benchmarks, finished floor elevation (FFE).
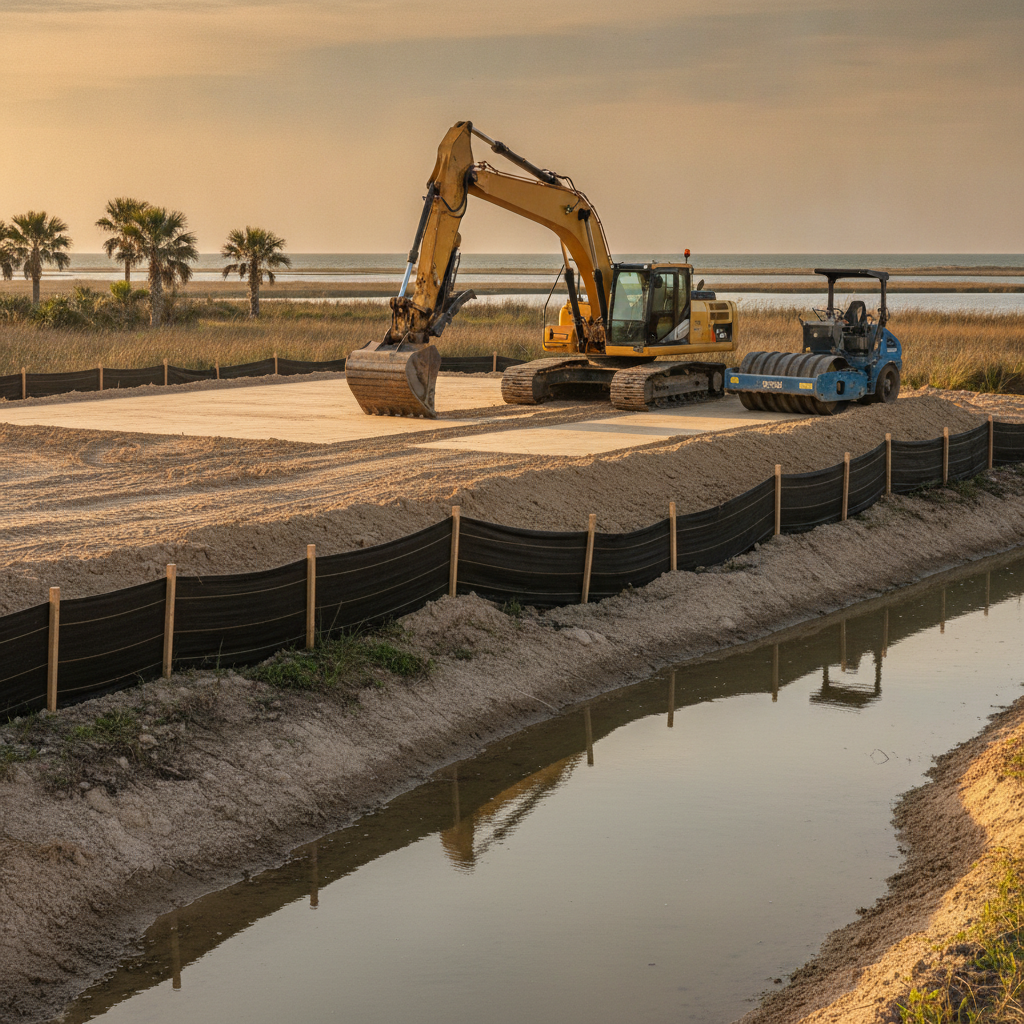
Action: Our site team reviews drainage patterns and compaction history. In sandy coastal soils, compaction targets and swales matter; well-planned grading reduces puddling after the first 1–2 heavy rains.
See our practical primer on location choices in Site Selection & Acquisition, which shows how setbacks and utilities affect final layouts.
3) Design, engineering, and selections
- Architectural plans: floor plans, elevations, window schedule, details.
- Structural: slab thickness, rebar/post-tension, wind loads, connectors.
- MEP coordination: HVAC sizing, duct routes, plumbing stacks, panel location.
Action: We hold a cross-trade clash review to catch conflicts (e.g., a beam intersecting a duct). Finding it on paper saves days in the field and avoids cutting into new framing.
Design momentum is everything. Our building design and construction overview explains how to lock drawings while selections move in parallel.
4) Permits and approvals
- Submit plans for building, zoning, and any environmental clearances.
- Track comments and resubmit revisions quickly to keep the queue moving.
- Pre-book pre-pour and framing inspections as the schedule firms up.
Action: Early permitting reduces downstream crunch. We also coordinate utility locates to prevent dig delays when equipment mobilizes.
For timeline thinking and decision batching, this renovation timeline explainer highlights how tempo drives outcomes; review the timeline planning overview for sequencing ideas that also apply to new builds.
5) Site preparation and erosion control
- Clear and grub vegetation, remove unsuitable soils as needed.
- Rough grade for drainage, install silt fence and inlet protection.
- Stake building corners and set batter boards with FFE marks.
Action: We install stormwater measures before bulk earthwork. It’s faster and helps avoid rework after the first rain cell passes through. For a deeper dive on earthwork sequencing, see our land construction guide.
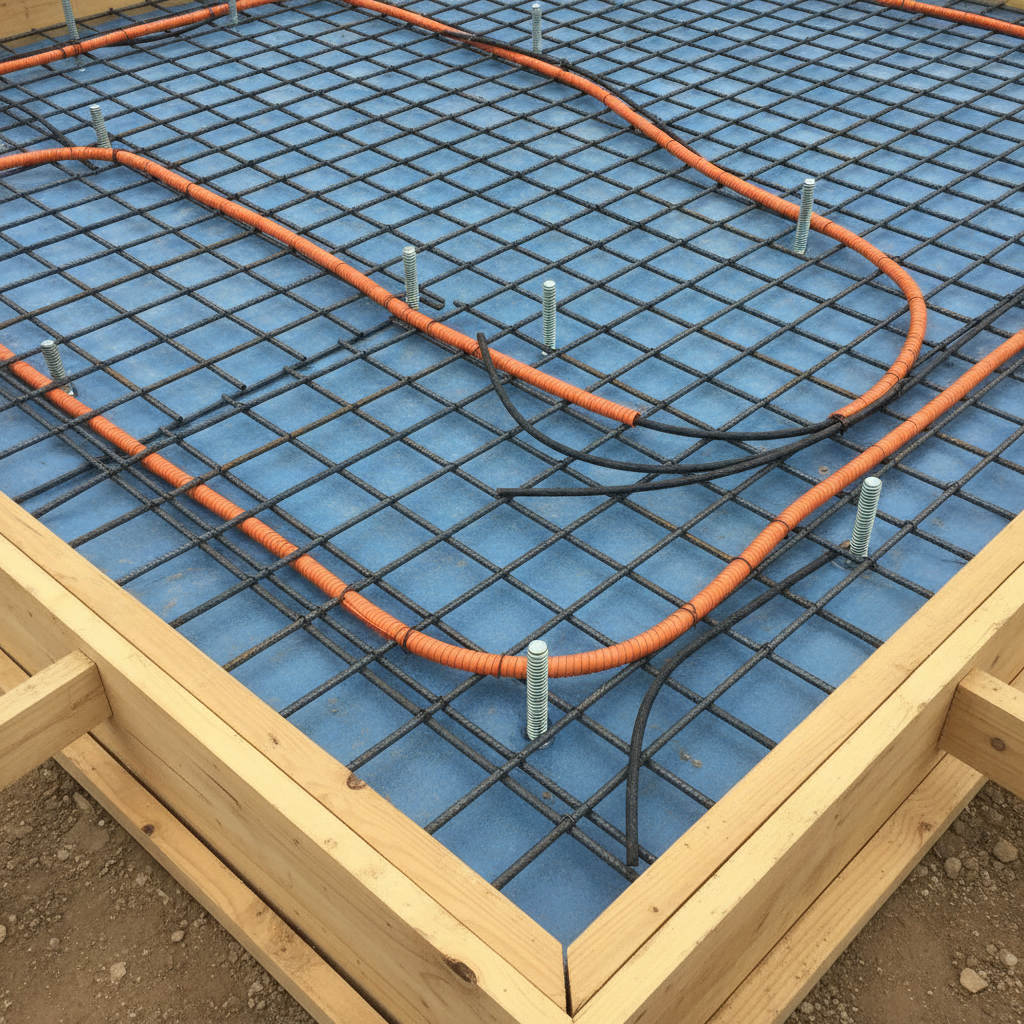
6) Foundation: forms, steel, pour, cure
- Form and reinforce slab or grade beams with rebar/post-tension cables.
- Pre-pour inspection verifies vapor barrier, steel chairs, and anchor bolts.
- Concrete placement and curing; protect edges; set sill plates after initial cure.
Action: In our experience, leaving at least 72 hours before heavy loading reduces edge damage and keeps layouts accurate for framing crews.
Foundation quality sets the tone for the rest of the project. We document rebar patterns, vapor barrier integrity, and anchor bolt locations with photos before the pour and again after forms are stripped.
7) Framing and sheathing
- Frame floors and walls, set trusses, brace, and sheath.
- Install roof deck and dry-in with underlayment to beat the next rain cell.
- Shear and hold-downs installed per engineer details for wind resistance.
Action: We stage fasteners and connectors by room to speed inspections. Inspectors appreciate organized sites, and clean staging cuts inspection time. Expect framing and sheathing checks to validate connectors, nail patterns, and bracing before moving to rough-ins.
8) Rough-ins: HVAC, electrical, plumbing
- Route ducts and set air handler locations per Manual J/S/D principles.
- Pull circuits to panels, set boxes, and label homeruns by room.
- Plumb stacks, venting, and pressure test supply lines.
Action: We hold a pre-cover walkthrough so owners can photograph framing and wiring before drywall. Those photos become gold during future upgrades.
Rough-in inspections typically verify protection plates, drilling in studs, strapping, vent terminations, and panel clearances. Clear labeling and swept floors make it easier to get a green tag on the first visit.
9) Exterior systems and insulation
- Install windows and doors, verify flashing and shims.
- Weather-resistive barrier taped with manufacturer-specified patterns.
- Insulate walls and attic to the selected R-values for Texas climate zones.
Action: We verify window labels match the approved schedule. Substitutions can slow inspections if not documented. Flashing photos taken before siding protect warranty conversations later.
10) Drywall and interior carpentry
- Hang drywall, tape, float, and texture to owner preference.
- Set interior doors, baseboards, and window/door trim.
- Install cabinets with blocking verified in rough-stage photos.
Action: Dust control and daily housekeeping protect finishes. Clean sites save money and time—every day. We also keep touch-up kits labeled by room to speed punch-out.
11) Fixtures, surfaces, and paint
- Prime and paint in the correct sequence to reduce touch-ups.
- Set plumbing trim, appliances, and light fixtures.
- Flooring installed last to limit damage from other trades.
Action: We keep a running punch list visible to all trades. Small fixes handled early prevent compounding delays and help inspections go faster at finals.
12) Finals, walkthrough, and handover
- Schedule finals across building, electrical, plumbing, and HVAC.
- Owner walkthrough to verify function and finishes room by room.
- Turnover package: manuals, paint codes, and warranty documents.
Action: We document every serial number and warranty contact so you can service equipment easily in year one and beyond.
To see how we keep calendars realistic, explore our project planning and scheduling approach, which outlines buffers and inspection booking windows.
Methods and approaches you can choose
Homebuilding methods vary by structure and delivery: slab-on-grade or pier-and-beam foundations, stick-built or panelized frames, and design-bid-build or design-build delivery. Coastal Texas often favors slab-on-grade with wind-rated fastening and a design-build path to streamline permitting and speed groundbreak.
Structure and foundation
- Slab-on-grade: efficient on stable soils, compatible with post-tension.
- Pier-and-beam: elevates finished floor above grade and flood concerns.
- Hybrid solutions: grade beams with structural slabs in select areas.
In our coastal projects, finished floor elevation planning is crucial. Early staking and benchmark checks help ensure the slab or beam heights meet drainage design and community guidelines.
Framing approach
- Stick-built: flexible on custom lots, great for on-site adjustments.
- Panelized: faster dry-in, factory-built walls reduce weather exposure.
- Engineered connectors: clips, straps, and hold-downs for wind loads.
Stick-built framing remains common for one-off custom homes. Panelization can be a win when access is good and designs repeat. We choose based on site logistics and target dry-in dates.
Project delivery
- Design-bid-build: architect designs, then contractors bid.
- Design-build: one team designs and builds; fewer handoffs.
- Construction management: owner retains CM to coordinate trades and schedule.
In our Texas work, design-build often shortens the runway because we can submit early packages while finishes are still being selected. That parallel path can trim several weeks before the slab pour, especially when permits and utility approvals run in tandem.
Best practices for coastal Texas homebuilding
Prioritize drainage, wind-resistant assemblies, and moisture control. Set the finished floor elevation to manage stormwater, use rated connectors and fasteners, and detail flashing and WRB meticulously. Schedule around storm season and document every inspection to keep finals clean.
- Drainage first: positive slope away from the foundation and stabilized swales.
- Wind-rated fastening: connectors and sheathing patterns per engineer.
- Moisture management: flash openings correctly; ventilate attics.
- Inspection readiness: clean, labeled, and accessible work areas.
- Owner communication: weekly updates with photos and milestone checklists.
We’ve found that photographing flashing before siding goes up avoids disputes and rework. It’s a simple habit that protects long-term performance and speeds final approvals. For more on residential building nuances in Texas, browse our residential construction overview.
Tools and resources to keep your build on track
Use a shared schedule, a selections tracker, and inspection checklists. Add stormwater and energy resources relevant to Texas, and keep permit submittals organized. Clear documentation reduces delays, helps inspectors, and keeps warranty records accurate at handover.
- Master schedule with target dates for inspections and deliveries.
- Selections tracker for windows, doors, fixtures, and finishes.
- Inspection checklists for pre-pour, framing, rough-in, and finals.
- Stormwater plan with erosion controls and photo logs.
- Energy details: insulation, air sealing, and duct testing milestones.
We maintain a single source of truth so everyone sees the latest decisions. That practice alone prevents dozens of small mistakes from becoming schedule slips. For a quick lens on common sequencing pitfalls, see this full house renovation explainer and this planning checklist example to adapt into your build notebook.
Mini case studies from our Texas projects
On recent custom builds and infill homes, we cut delays by sequencing crews and pre-booking inspections. Early utility coordination, accurate staking, and a clean stormwater setup consistently kept schedules tight and finals clean—key wins for on-time move-ins across Texas cities.
Galveston coastal custom home
- Challenge: Sandy soils and a tight weather window near storm season.
- Approach: Parallel design-permit submissions; dry-in roof within one week of framing.
- Outcome: No weather rework; clean framing inspection and on-time dry-in.
We paired elevation planning with wind-rated connectors and verified flashing before cladding. That sequence helped us pass inspections on the first attempt.
College Station infill lot
- Challenge: Limited access for deliveries on a narrow lot.
- Approach: Just-in-time lumber drops; daily housekeeping to keep lanes open.
- Outcome: Zero delivery conflicts; smooth inspections with clear labeling.
We also color-tagged rough-in lines by trade in the staging area so inspectors could trace runs quickly without confusion.
Sugar Land family home
- Challenge: Complex selections and midstream appliance changes.
- Approach: Selections tracker shared with subs; documented substitutions.
- Outcome: No delays at trim-out; accurate warranty package at handover.
We batched substitution approvals weekly and updated labels on-site, which prevented misinstalls and saved multiple days at the finish stage.
Local considerations for Galveston
- Plan around storm season: target slab pours and roof dry-ins outside peak months when feasible.
- Design for moisture and wind: specify flashing details, WRB tapes, and wind-rated connectors.
- Mind elevation and drainage: confirm finished floor elevation early and grade for positive runoff.
Considering a build in or near Galveston? Our team can walk your lot, review your goals, and outline a realistic 12-step path—no pressure, just expert guidance.
Schedule a planning conversation and get a practical roadmap.
Frequently asked questions
Most homeowners ask about timelines, inspections, change management, and weather planning. Clear sequencing, early bookings, and disciplined documentation help keep schedules predictable and closeouts smooth—even in coastal conditions.
How long does a typical home build take in coastal Texas?
Most single-family builds run several months from permit to keys, depending on design complexity and weather. Dry-in speed and inspection readiness make the biggest difference. We plan pours, framing, and roof underlayment to hit dry windows and pre-book inspections to avoid calendar gaps.
What inspections are required before drywall?
You’ll typically see framing, electrical, plumbing, and HVAC rough-in inspections before insulation and drywall. We also walk the site with you to photograph mechanicals in walls and ceilings. Those photos help future upgrades without unnecessary demo.
When should I make final selections for windows, doors, and fixtures?
Early. We aim to lock window and door orders during design so lead times don’t stall framing. Fixtures and finishes should be selected before drywall to coordinate rough-ins. A shared selections tracker keeps everyone on the same page.
How do you plan around storms and rain?
We schedule pours and roof dry-ins to avoid forecasted systems when possible, protect stock on-site, and maintain erosion controls. Clean staging and fast dry-in reduce weather exposure and rework. Photo logs document controls after each rain.
What documents do I receive at handover?
You receive manuals, paint codes, equipment serials, and warranty information in a digital package. We also provide inspection records and key photos from pre-cover stages. That documentation makes service and future improvements easier.
Conclusion and next steps
House-building goes smoother when you follow a clear, 12-step plan and document each milestone. Align decisions early, book inspections ahead, and keep the site clean. If you’re building around Galveston, plan for wind, drainage, and storm windows in the schedule.
- Key takeaways
- Lock scope and selections early to cut delays.
- Sequence trades and inspections to stay on schedule.
- Document stormwater, flashing, and pre-cover details.
- Design for wind and moisture in coastal Texas.
- Suggested action steps
- Write your one-page program with must-haves and performance targets.
- Walk the site for drainage, access, and elevation today.
- Start your permit set and order long-lead windows early.
- Adopt a shared schedule and selections tracker from day one.
If you want a deeper dive on the steps to building a house and how they align with Texas requirements, our team can tailor this 12-step framework to your lot and timeline. Book a discovery session in Galveston and get a construction-ready roadmap.